Step-by-Step Guide to Timber Flooring Installation for Southport Residents
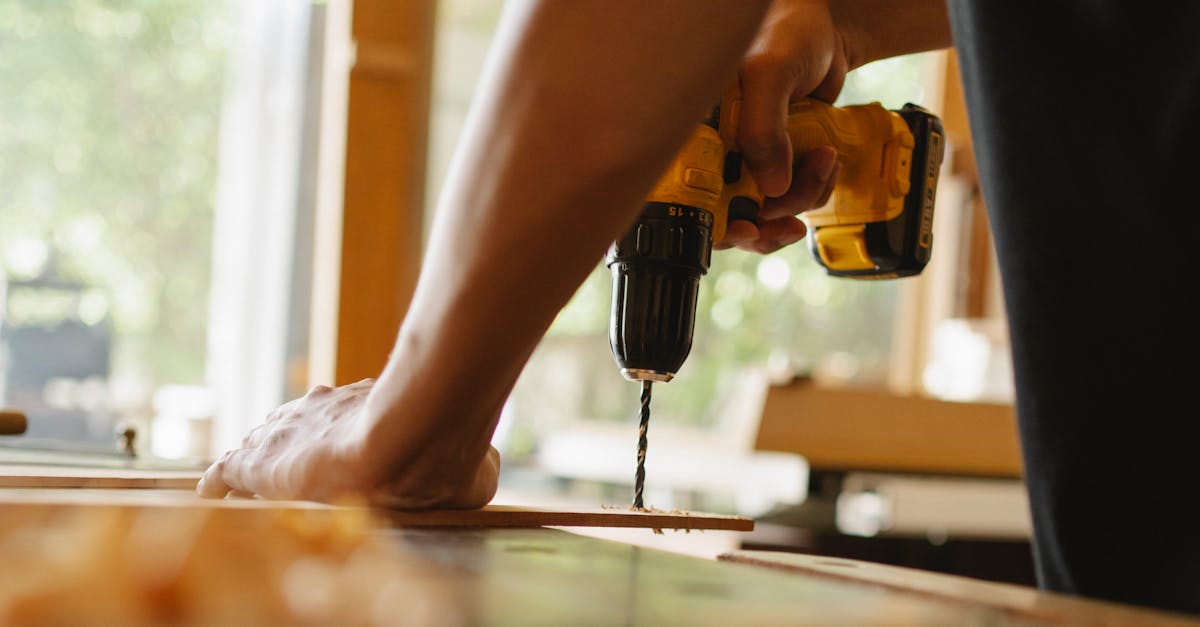
Table Of Contents
Installing Underlay for Timber Flooring
Before laying timber flooring, it is essential to install a suitable underlay. Underlay acts as a cushioning layer, providing sound absorption and thermal insulation. It helps to minimise creaking sounds and enhances comfort underfoot. Additionally, a quality underlay can protect your flooring investment by acting as a moisture barrier, preventing potential damage from rising dampness.
Choosing the right type of underlay depends on various factors, including the type of timber flooring and the specific conditions of your home. There are foam, rubber, and acoustic underlays available, each offering different benefits. Ensure that the chosen underlay is compatible with the flooring material while also meeting the acoustic and moisture requirements of your space. Proper installation of the underlay is crucial, so ensure it is laid flat without any wrinkles or overlaps for optimal performance.
Benefits of Quality Underlay
Quality underlay serves multiple purposes that enhance the overall flooring experience. One of the primary benefits is improved sound insulation, which helps reduce noise levels within the home. This can be particularly advantageous in multi-storey buildings or high-traffic areas. Additionally, quality underlay contributes to better thermal insulation, making living spaces warmer in winter and cooler in summer.
Another significant advantage is the added comfort underfoot. A good underlay provides cushioning, making walking or standing on your timber floor more enjoyable. This is especially beneficial for families with young children or pets, as it can soften falls and reduce the risk of injury. Furthermore, using a quality underlay can extend the life of the timber flooring by providing a stable and supportive base.
Laying the Timber Boards
Once your underlay is in place, it is time to lay the timber boards. Begin at one corner of the room, ideally the longest straight wall. It’s important to check that the wall is straight using a level or a straight edge. If there are any deviations, adjustments may be necessary to maintain an even line when installing the boards. The tongue and groove design of the boards should align perfectly to ensure a tight fit.
As you progress, use spacers along the walls to allow for expansion and contraction. This small gap is crucial, as timber can respond to changes in temperature and humidity. Start laying boards from the left and work your way right. Each board should be tapped gently into place using a tapping block to avoid damaging the edges. Regularly check for levelness and alignment throughout the process to ensure a seamless appearance once installation is complete.
Step-by-Step Board Installation Process
Begin by laying the first timber board along the longest wall of the room. Ensure it is positioned with the tongue side facing the wall. Use spacers between the board and the wall to maintain an expansion gap recommended by the manufacturer. Tap the board gently to fit it in place, ensuring a snug fit into the adjacent board. This first row is crucial, as it sets the alignment for the entire floor.
Continue installing subsequent boards by connecting them to the previous ones. Angle them slightly to engage the tongue and groove, then lay them down flat. Use a tapping block to connect the boards without damaging their edges. Regularly check that the boards remain straight and that gaps between them are minimal, adjusting as necessary. Maintain consistent expansion gaps at the walls with spacers throughout the entire installation process.
Cutting and Fitting Timber
Accurate cutting and fitting of timber is essential for a seamless finish during your flooring installation. Begin by measuring the space carefully, allowing for expansion gaps as recommended by the manufacturer. Use a quality circular saw or mitre saw for precise cuts. Ensure that your saw blade is sharp to prevent splintering the timber. Mark your measurements clearly on the board, and double-check before cutting for the best results.
Once the pieces are cut to size, dry fit them into place to confirm they fit correctly. This step allows you to see how the boards will align and if any adjustments are necessary. If you encounter irregularities in the subfloor or the timber boards, be prepared to sand down edges or shave off small amounts to achieve an exact fit. Allow your flooring to acclimatise in the room for several days before installation, as this helps minimise potential movement and warping after the boards are laid down.
Techniques for Accurate Cuts
Accurate cuts are essential for achieving a professional finish when installing timber flooring. Using a mitre saw or circular saw ensures clean edges and precise angles. Proper measuring is critical; always take multiple measurements before cutting. Mark the timber with a pencil, using a straight edge or ruler to create a clear line. This technique minimizes errors and allows for adjustments as needed.
When working with intricate patterns or in tight spaces, a jigsaw or hand saw may be more suitable. These tools provide better control for detailed cuts. Ensure the blade is sharp, as a dull blade can lead to splintering and uneven edges. Another useful tip is to cut slightly outside the marked line, allowing for fine-tuning during the fitting process. This approach not only improves accuracy but also enhances the overall look of the finished flooring.
FAQS
What type of underlay is best for timber flooring?
The best type of underlay for timber flooring is generally a high-density foam or rubber underlay, as it provides excellent sound insulation and cushioning, enhancing the overall comfort of the floor.
How do I ensure my timber boards are straight during installation?
To ensure your timber boards are straight during installation, use a chalk line to mark a guide on the underlay. Begin laying the boards along this line to maintain alignment throughout the installation process.
What tools do I need for cutting timber flooring?
Essential tools for cutting timber flooring include a circular saw or a mitre saw, a measuring tape, a square for marking straight lines, and safety gear like goggles and ear protection.
Can I install timber flooring over existing floor surfaces?
Yes, you can install timber flooring over existing floor surfaces as long as they are level, clean, and dry. However, it’s advisable to check the manufacturer's guidelines for specific requirements.
How long does it take to install timber flooring in an average-sized room?
The time required to install timber flooring in an average-sized room can vary, but typically it takes about one to two days, depending on the complexity of the layout and the skill level of the installer.
Related Links
Essential Tools Every Homeowner Needs for Timber Flooring InstallationHow to Choose the Right Timber Flooring for Your Residential Space
The Importance of Acclimating Timber Before Installation in Humid Climates
Ensuring a Perfect Finish: Sanding and Sealing Timber Floors After Installation
DIY vs Professional Timber Flooring Installation: Which is Right for You?
Selecting the Best Timber Species for Residential Flooring in Southport
Common Mistakes to Avoid When Installing Timber Floors in Your Home
Understanding the Cost of Residential Timber Flooring Installation
The Advantages of Installing Timber Flooring in Southport Homes